Introduction to git
What is Git?
Git is a version control system (VCS) which exists as a distributed tree based repository. It’s used for storing and versioning documents and code, and allows you to at any time retrieve any of the files from any of the current or past versions of the repository. It also has features like file locking to ensure that only one person at a time can make edits to a file, automatic merging for when two users make changes to the same file at the same time but don’t conflict with each other, and assisted merging for when two users make changes to the same part of the same file at the same time. Most importantly Git is useful for never losing your work by not only backing it up in the cloud but by also ensuring that you can always revert back to a pervious version on a per-file/folder/repository basis.
How to install Git
If you’re working with Github, which you probably are, and you don’t want to learn command line interfaces, which you probably don’t, then you should just simplify your life and download Github Desktop. It’s available for both Windows and OSX.
If you’re on Linux, or would rather learn how to use git from the command line (which is generally faster once you get used to it), then you should simply use Git. Here is a good link which gives the basic instructions for installing Git under Linux, OSX, and Windows.
How to use Git
Most of the time you’re using Git, you won’t notice it. That’s because most of the time you’re simply working as usual, occasionally commiting your changes and pushing them into the cloud to back them up. However, before you can do any of that, you must have a Git repository.
Creating a repository
The easiest way to make and host a backed-up accessible git repository is through Github. There (as a registered user, free account) you can create your own repositories which are hosted at http://github.com/${user name}/${repository name}. If you have are part of an organization (or create one), you can also create a repository under the organization which will be hosted at http://github.com/${organization name}/${repository name}. For this team, you should be a part of and use the VADL organization, so create any related repositories (that your team members will be using as well) in the VADL organization. Creating a repository is as easy as pressing the button that says New Repository and giving it a name. Generally you do want to click the box that says Initialize this repository with a README, since that will allow you to immediately start working on it.
Cloning a repository
Once you’ve created a repository (or if someone else already has, and you’ve been given access by them or through a shared organization), you can clone the repository onto your computer, which downloads the entire repository (and its history), compressed of course, into a folder of your choosing.
Github Desktop
In Github Desktop, this is as simple as clicking in the upper left to clone a new repository and selecting one of the available repositories that it shows you (those are all the repositories to which you have write access).
Git console
To clone a repository (whether or not you have write access) in git console you have two options, shown here as examples:
$ git clone git@github.com:${user/organization name}/${repository name} ${optional folder name}
and
$ git clone https://github.com/${user/organization name}/${repository name} ${optional folder name}
e.g.
git clone git@github.com:vadl/agse
git clone git@github.com:vadl/agse AGSE_REPO
git clone https://github.com/vadl/agse
git clone https://github.com/vadl/agse.git
git clone https://github.com/vadl/agse AGSE_REPO
When using the git@<url> syntax, it will use any configured ssh keys, otherwise it will ask you for login information.
Configuring SSH Keys
If you were to clone a directory using the git@<url> syntax without any prior setup, you will probably encounter the following:
git clone git@github.com:vadl/agse
Cloning into 'agse'...
The authenticity of host 'github.com (192.30.253.112)' can't be established.
RSA key fingerprint is 16:27:ac:a5:76:28:2d:36:63:1b:56:4d:eb:df:a6:48.
Are you sure you want to continue connecting (yes/no)? yes
Warning: Permanently added 'github.com,192.30.253.112' (RSA) to the list of known hosts.
Permission denied (publickey).
fatal: Could not read from remote repository.

Please make sure you have the correct access rights
and the repository exists.
This is because git is trying to authenticate the session using something called ssh keys. These kes take the form of a private and public key pair. Github needs access to the public key.
The first step is to generate a key pair. Type the following into the terminal:
ssh-keygen
Accept the default key location and press enter twice when asked for a passphrase in order to leave it blank. It should look like the following:
ssh-keygen
Generating public/private rsa key pair.
Enter file in which to save the key (/home/<username>/.ssh/id_rsa):
Enter passphrase (empty for no passphrase):
Enter same passphrase again:
Your identification has been saved in /home/<username>/.ssh/id_rsa.
Your public key has been saved in /home/<username>/.ssh/id_rsa.pub.
The key fingerprint is:
SHA256:gGJtSsV8BM+7w018d39Ji57F8iO6c0N2GZq3/RY2NhI username@hostname
The key\'s randomart image is:
+---[RSA 2048]----+
|   ooo.          |
|   oo+.          |
|  + +.+          |
| o +   +     E . |
|  .   . S . . =.o|
|     . + . . B+@o|
|      + .   oo*=O|
|       .   ..+=o+|
|           o=ooo+|
+----[SHA256]-----+
Congratulations, you now have an ssh key pair residing in /home/<username>/.ssh titled id_rsa and id_rsa.pub.
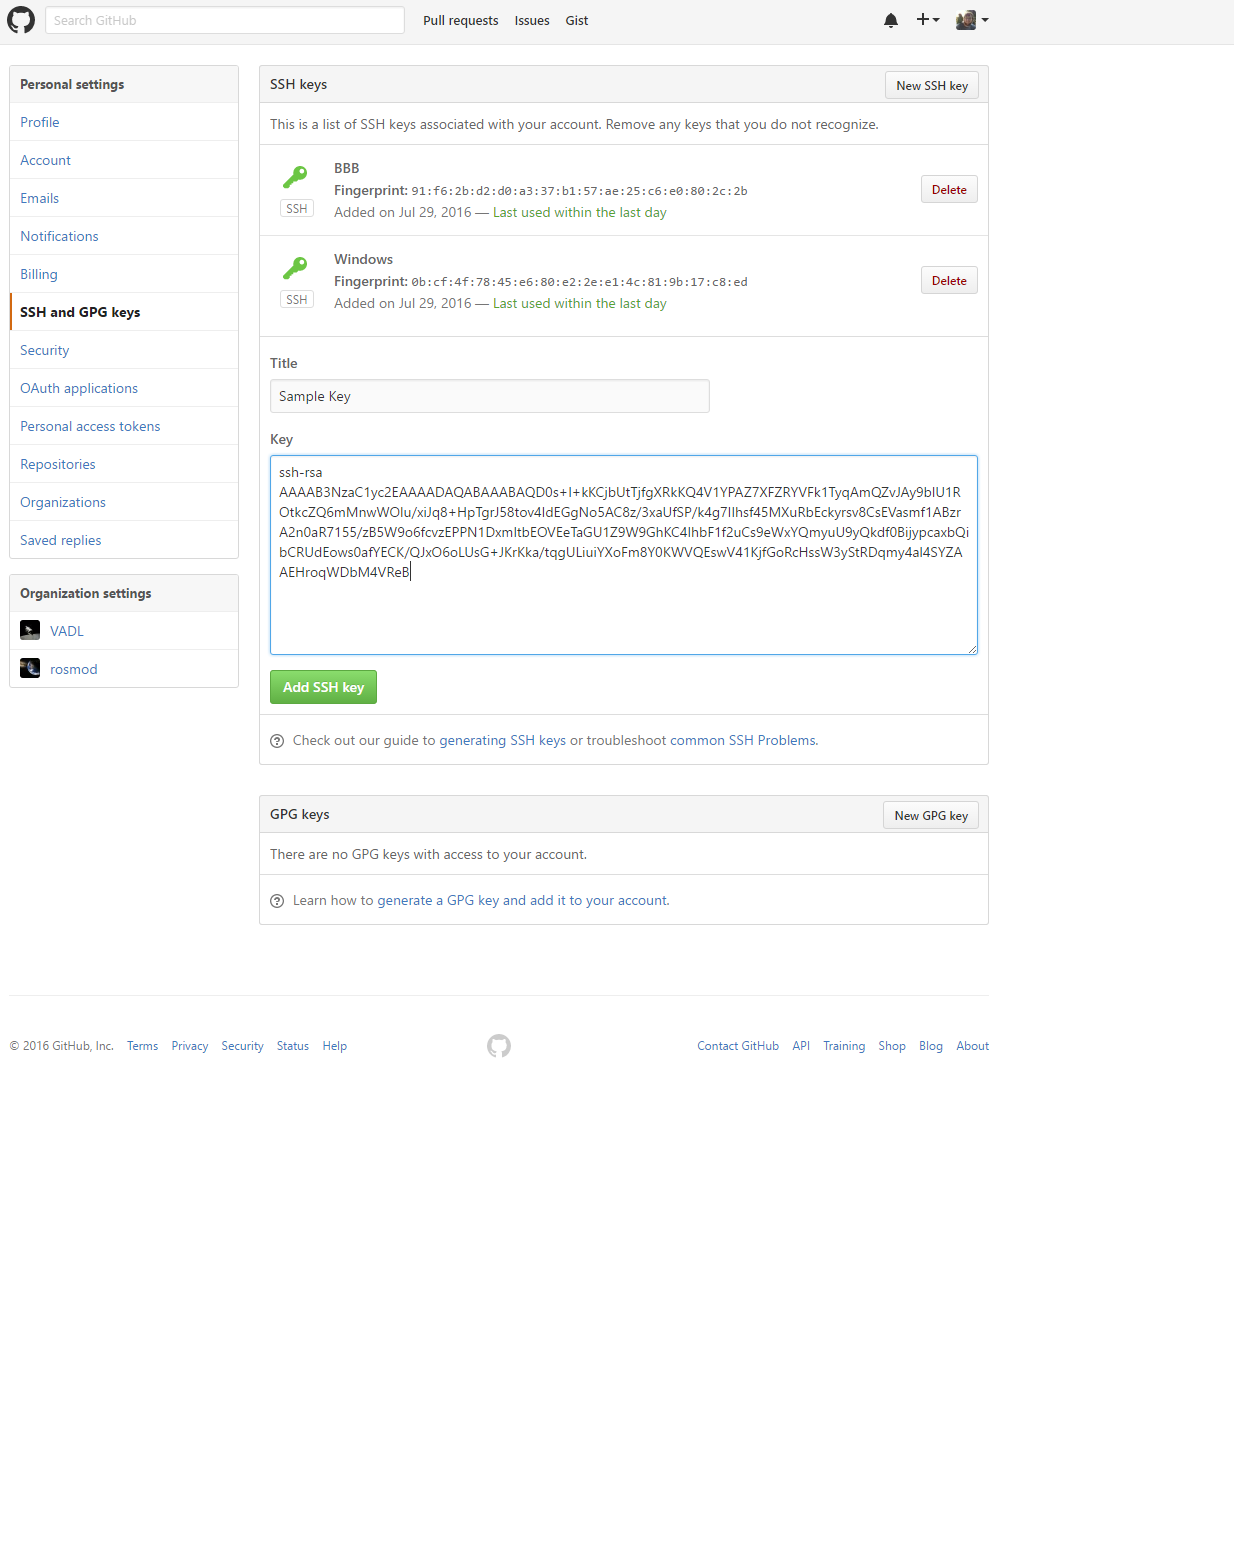
The next step is to add the public key (id_rsa.pub) to your github profile. Navigate to your profile on github.com and click on edit profile. Next, select SSH and GPG keys from the left-hand menu. Click New SSH Key on the top right of the screen, and give it a name (the name doesn’t matter). Next, go back to the terminal and enter the following command:
cat ~/.ssh/id_rsa.pub
You will see a mess of letters and numbers similar to what is below
cat ~/.ssh/id_rsa.pub
~/.ssh/id_rsa.pub
ssh-rsa AAAAB3NzaC1yc2EAAAADAQABAAABAQD0s+l+kKCjbUtTjfgXRkKQ4V1YPAZ7XFZRYVFk1TyqAmQZvJAy9blU1ROtkcZQ6mMnwWOlu/xiJq8+HpTgrJ58tov4IdEGgNo5AC8z/3xaUfSP/k4g7IIhsf45MXuRbEckyrsv8CsEVasmf1ABzrA2n0aR7155/zB5W9o6fcvzEPPN1DxmltbEOVEeTaGU1Z9W9GhKC4IhbF1f2uCs9eWxYQmyuU9yQkdf0BijypcaxbQibCRUdEows0afYECK/QJxO6oLUsG+JKrKka/tqgULiuiYXoFm8Y0KWVQEswV41KjfGoRcHssW3yStRDqmy4al4SYZAAEHroqWDbM4VReB root@luthadel
Copy everything from ssh-rsa to the end of the random string (exlcuding any user@host at the end!). Paste this into the Key window in the github profile and you should have something similar to the following image.
Now, cloning (and pushing/pulling) a repository will be sucessful! There is one more thing we can do though to make the process more streamlined in the future.
Git Global Config
We are going to set up a global username and email for git to use when pushing to github. This will prevent you have having to type in the information every time. Simply type the following into a terminal:
git config --global user.name "<Your Name Here>"
git config --global user.email "<Your Email Here>"
That’s it, you done!
Working as usual
Once you’ve cloned the repository, you can add files and edit existing files as you want, without having to use any interface or anything. Simply do your work as you normally do.
Commiting your work locally
Every so often (generally when you’ve fininshed editing a file, or reached a stopping point you should commit your work so that it becomes part of the history of the repository. You generally want incremental changes as opposed to doing a lot of work and committing everything at once. The reason for this is in case you need to roll back (revert) some of the edits or in case you run into a merge conflict (e.g. if you and someone else touched the same file at the same time).
When you’re ready to commit you need to do three things:
- Update your local copy of the repository, this ensures that you’ve gotten any changes others have pushed to the repository since the last time you pulled or since when you cloned the repository:
$ git pull
Or in Github Desktop you simply sync.
- Tell git which files you’ve changed and want to commit:
$ git add <files to add>
Note: you can git add multiple times. On the console, use git status to have it tell you what you’ve committed and what you’ve changed but haven’t committed, and what you’ve added but not told git to version.
If you’re on Github Desktop, simply switch to the changes tab and select the files you want to add.
- Write a commit message and perform the commit:
$ git commit -m "<commit message here>"
Or if you’re on Github Desktop, just write the message in the text box when you add the files.
Pushing your work to the cloud
After you’ve edited files, pulled updates, add committed your changes you need to push those changes to the cloud.
git push
or press the sync button in Github Desktop.
Pulling others’ work from the cloud
As stated above, pulling every so often to update your local copy of the repository is paramount to ensuring consistency.
$ git pull